Roofing contractors may regard solar panel solutions as a product offering that requires expert skill and specialist knowledge when it comes to successful installation. Yet with ease of installation at its core, Stuart Nicholson at Marley, highlights how the new Marley SolarTile offers a valuable commercial opportunity for roofers who have overlooked the potential of solar until now
Photovoltaics (PV) systems – better known as solar panels – are already popular with homeowners, with the Energy Savings Trust estimating that adding solar panels to a roof space can cut an annual household electricity bill by over £250.
And with homeowners soon to be able to take advantage of the Green Homes Grant, a scheme outlined recently by the UK government to provide eligible homeowners with vouchers to pay for environmentally-friendly home improvements, the popularity of solar panels is further expected to rise.
With no specialist skills or expertise required to install, Marley SolarTile, presents an excellent business building opportunity for the construction trade with roofing contractors in a prime position to widen their service offering, and add solar panel installation to their portfolio of roofing solutions.
By following the straightforward installation procedures that are available and taking the time to build up confidence around a new product solution, roofers shouldn’t be hesitant about undertaking solar panel jobs, and can begin to examine how they can open up new revenue streams to complement more traditional roofing installations.
Marley SolarTile – integrated and easy
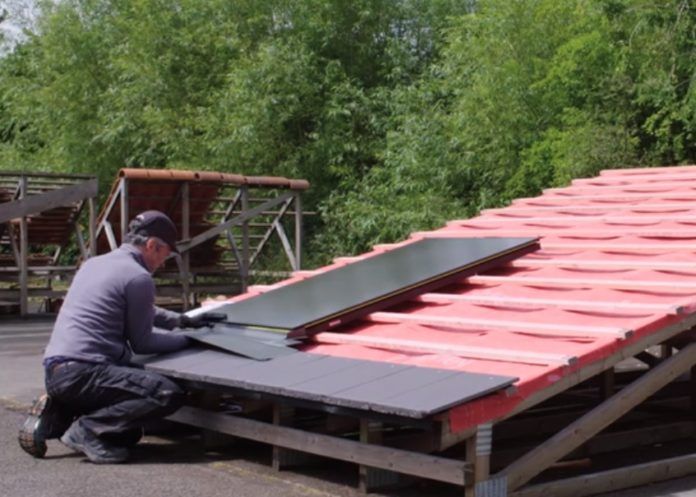
To help the industry, Marley has recently launched Marley SolarTile, a roof-integrated solar panel solution. All the required components in the installation kit are housed in colour coded boxes, which are accompanied by an easy-to-follow instruction guide, meaning contractors can follow a few clear steps to quickly get to grips with the simple installation process. This includes securing the initial fixings, placing the solar tile in position, undertaking a push-fit process for additional tiles, and finishing the install with final fixings and flashings.
The new system is designed for an integrated installation over a standard roof construction with 25mm battens in place and a continuous functional underfelt that terminates in a gutter. For existing battens of other sizes or sarked roofs, alternative kits are available.
Marley SolarTile works seamlessly with existing roof structures to directly replace roof tile sections and is a quick and simple way to provide a greener and cost-effective energy source for homeowners.
Installation tips
For contractors looking to add solar panel installation alongside more conventional roofing services, following sound advice and practical tips will help projects run smoothly and help to build up experience and expertise.
Installation overview – When thinking about solar panel installs that integrate with interlocking tiles, you should set the lower gap at 130-150mm. When working on a slate roof, it is best to align the bottom edge of the solar panel with the slate line. This may require that the slates below the panels are nailed in advance of the panels being fitted. Finally, always start the install at the bottom left of the area and move to the right as each column is finished.
Fixing guidance – Remember that flashings may have sharp edges, so wearing protective gloves is always recommended. In addition, installations must comply with local regulations on lightning protection, so check this is in place.
Electrical issues – It is important to electrically test each solar panel prior to installation and the Marley SolarTile installation kit provides information on how to do this. It is recommended that the panel’s electrical cables are passed through the roofing membrane laps for connection inside the building or connected to adjacent panels in the batten space. Always choose to connect panels in rows or columns based on how shaded the roof area could potentially be. And, finally, the panel system can be installed with the junction box at the top or the bottom of the install area for added flexibility.
Marley has created a suite of helpful demonstration materials to enable contractors to gain confidence around solar panel solutions and successful installations to help meet the forecasted growth of demand for solar roofing solutions in the years ahead. The materials include short explanatory videos that cover the entire installation process.
For more information on the Marley SolarTile or to view a demonstration installation video, click here.


